Do-It-Yourself information for the modifications I've completed

Do-It-Yourself information for essential wear and tear items

Articles covering all the ways to maintain your car

All about the BMW 330ci

Various links that I've found valuable

A few pictures of my car and some others

Changing Your Brakes

Warning!
The information provided at "Bmw330ci.net" web site is "as is" with all faults and without warranty of any kind, expressed or implied, including those of merchantability and fitness for a particular purpose, or arising from a course of dealing, usage or trade practice. "Bmw330ci.net" web site nor it's owner/creator, can not and does not provide any warranty, expressed or implied, about the accuracy or use of information found on "Bmw330ci.net" web site. The user assumes that risk.

THE USE OF THIS INFORMATION IS FOR YOUR REFERENCE ONLY. BMW330CI.NET AND ITS OWNER/CREATOR DISCLAIM ALL LIABILITY FOR DIRECT, INDIRECT, INCIDENTAL, OR CONSEQUENTIAL DAMAGES OR INJURIES THAT RESULT FROM ANY USE OF THE EXAMPLES, INSTRUCTIONS OR OTHER INFORMATION ON THIS PAGE.

Difficulty
Changing your brakes isn't very challenging at all. It may seem a bit difficult if you have never done it before, but I promise that it's really quite easy. The hardest part is lifting up the car and taking off each wheel. The anti-rattle clips can be confusing at first, but with a big screwdriver, everything will work out. After you've done it once, you'll never take another car in.

Choosing the Right Pads and Rotors
If you've done your research, you'll find a ton of people out there that will tell you different pads or rotors are best (OEM vs. Aftermarket). For my rotors, I picked up a set of BMW's performance rotors which are currently discontinued (I had them in the garage for a couple years). These are two piece floating rotors on the front and are amazing! As far as making a difference, they will help with unsprung weight, but the average driver won't notice any difference. Therefore, I'd recommend a quality blank rotor. As far as pads go, I was looking for the following items: 1. Better than OEM stopping power 2. Lower dusting (not that big of a deal to me) 3.The ability to take the car to the track and use the same pads. Therefore, after reading a lot of reviews I settled on Performance Friction Z-Rated Pads. Once I've driven on them for a while and have made sure they're properly bedded, I'll write up a review on the pads themselves.
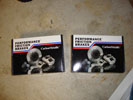

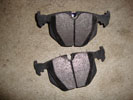
Performance Friction Z-Rated Pads

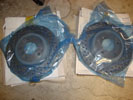
Performance Rear Rotors

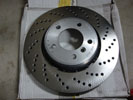
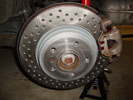
Performance Front Rotor

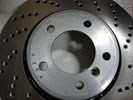
Performance Front Rotor Closeup

Tools Needed
Torque Wrench (20-100 Ft-Lbs)
6mm and 7mm Allen Socket
Various Sockets and Wrenches (17mm)
Flat Head Screwdriver (Bigger the better)
Rubber Mallet (A more powerful hammer may be needed if the rotor gets stuck)

Parts Needed
BMW Performance Cross Drilled Front Rotor x2 (BMW P# 34-11-0-431-905, BMW P# 34-11-0-431-906) $150
BMW Performance Cross Drilled Rear Rotor x2 (BMW P# 34-21-0-431-907) $150
Performance Friction Z-Rated Front Pads (P# 394) $100
Performance Friction Z-Rated Rear Pads (P# 548) $105
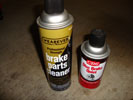
Brake Cleaner & Anti-Squeal Compound (Can be picked up at any auto parts store)
PB Blast or equivalent to help remove siezed rotors
Anti-Sieze Compound (To make the job easier next time)

Instructions

Safely lift the car
1. Using a lift or a floor jack with ramps lift at least the front of the vehicle. Instructions for jacking up your car can be found here. This can be a very dangerous step, so make sure that the car is properly secured before ever getting under it. Never get under a car that is just supported by a jack!

Rear Axle Instructions
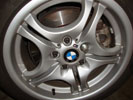

Remove the rear wheel
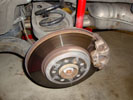

Remove the rear wheel

Remove the rear wheel
2. Using a 17mm deep socket with an impact wrench or hand ratchet, remove the lugnuts and set your wheels aside. If your alloys are siezed onto your brake rotors, sit down on your butt and give the sidewalls of the tires a good kick until it becomes loose. If they have siezed on, make yourself a note to add some antisieze lubricant to the brake rotor mating surface before reinstalling the wheels.


Remove the anti-rattle clip

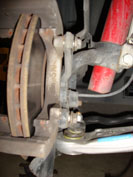
Remove the Anti-Rattle Clip
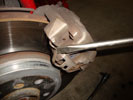
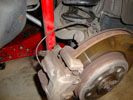
2. Using a flat head screwdriver, pry under the arms of the anti-rattle clips until they pop off. Be careful as they can pop of quite rapidly and suprise you! This will take a little bit of time to understand, but once you have got one the rest will come easily. Just take a look at the picture on the placement and my advice is to put a glove covered hand over the clip for when it pops off (otherwise you could hurt something or someone)


Upper dust cap


Lower Dust Cap


Pry off with screwdriver
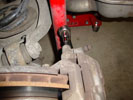

Remove guide bolts

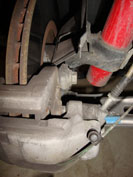
Remove the caliper guide bolts
3. Remove the 2 plastic covers from behind the caliper to expose the guide bolts. I just use a small screwdriver to pry them off. (You could use your fingernail, but as I'm sure you've noticed at this point everything is quite covered in brake dust).
4. Using the 7mm allen socket, remove the two guide bolts holding the caliper on. You can pull them all the way out to clean them and inspect them for proper operation.


Brake pad wear sensor


Everything disconnected

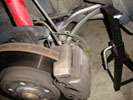
Disconnect the brake pad wear sensor (only on the rear passenger side)
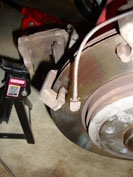
5. If you're replacing your pads before the brake pad sensor went off, you will need to preserve the existing one. Either way, disconnect the brake pad sensor from the bleeding nipple and plastic clip above the rotor. Otherwise, it will surely brake once you've popped the caliper off.


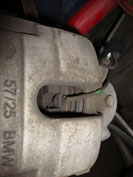
Remove pads from caliper


Brake pad sensor
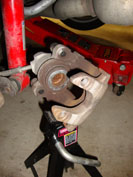

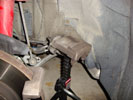
Make sure the caliper is supported

Remove the caliper and brake pads
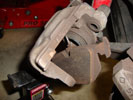
6. Remove the caliper from the carrier. While holding the caliper, use a small screwdriver to remove the the brake pad sensor. It is just held in place with a small metal clip, so it will eventually come out. I also recommend spraying some brake cleaner in there to help loosen things up.
7. Remove the brake pads from the caliper piston and set aside.
8. Depress the piston back into the caliper. This can be done using a C-clamp, special tool you can rent at the local auto parts store, or just by hand (if you're strong enough). This is due to the fact that the caliper is further out since the pads have worn away. In order to make the new pads fit over the rotor, this step is manditory.
9. Make sure that the caliper is properly supported. DO NOT LET IT HANG BY THE BRAKE LINES. I just used a spare floor jack since they're quite heavy, but feel free to innovate.


Remove bolts holding the support bracket
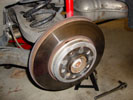

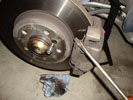
Caliper support bracket removed
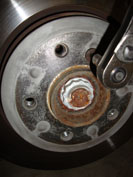

Remove rotor set screw
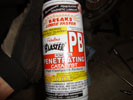

May be needed to help remove the rotor

Remove the caliper support bracket and brake rotor
10. Using a 17mm socket or wrench, remove the 2 bolts holding the carrier onto the assembly. Take it off and set it with the caliper. Take a moment to clean where the pads are held by the carrier.
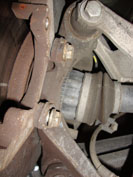
11. Using a 6mm allen socket, undo the set screw on the rotor. I always spray a little PB Blast on the hub and the set screw to make things easier to come apart. Note: I recommend cleaning up the set screw and applying some anti-sieze to make things come apart easier next time.
NOTE: The emergency brake MUST be off in order to remove the rotor! Make sure it's not engaged!
12. It is most likely that the rotors will be difficult to get off so use the rubber mallet to loosen it. It may take quite a few good whacks before it will come off, but I promise it eventually will. If you're never going to use the rotor again, feel free to innovate or use a bigger hammer.
13. Clean up the hub and apply some anti-sieze to make the next brake change easier.


My products in the garage


New brake pads
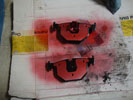

Spray some anti-squeal on the rear of the pads and on bracket
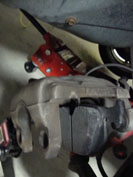

Reinstall the pad and sensor if applicable

Clean, lubricate, and install new pads
14. Take the new pads and lubricate the mating surfaces with some anti-squeal compound. I also recommend lubricating the caliper carrier where the pads rest. If not applied, your brakes can be noisy... so go ahead and lube it up.
15. The pad with the three metal prongs goes back into the caliper piston so put it in. Make sure that you reinstall/replace the brake pad wear sensor as well (for the rear passenger's side).


Everything put together


Another shot
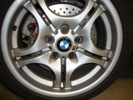

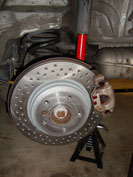
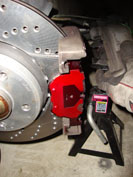
Finished look
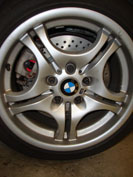

Finished look

Reassemble everything
16. Put the rotor back onto the hub and tighten the set screw it to 12 ft-lbs.
17. Put the carrier back on and tighten the 17mm bolts to 48 ft-lbs.
18. To reinstall the caliper, first set the other pad onto the caliper support bracket and then simply put the caliper with the other pad already installed over it. Tighten the 7mm allen bolts with the allen socket to 22 ft-lbs.
19. Using just your hands, snap the anti-rattle clips back onto the calipers.
20. Put the wheels back on (put some anti-sieze on the rotor hat if you had some trouble getting your wheels off before) and torque down your lug nuts to 88 ft-lbs after safely lowering your car.
21. Admire the finished product!


Front Axle Instructions


Remove the front wheel
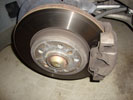

Remove the front wheel

Remove the front wheel
2. Using a 17mm deep socket with an impact wrench or hand ratchet, remove the lugnuts and set your wheels aside. If your alloys are siezed onto your brake rotors, sit down on your butt and give the sidewalls of the tires a good kick until it becomes loose. If they have siezed on, make yourself a note to add some antisieze lubricant to the brake rotor mating surface before reinstalling the wheels.


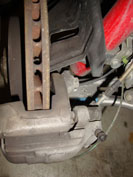
Remove the anti-rattle clip

Remove the Anti-Rattle Clip
2. Using a flat head screwdriver, pry under the arms of the anti-rattle clips until they pop off. Be careful as they can pop of quite rapidly and suprise you! This will take a little bit of time to understand, but once you have got one the rest will come easily. Just take a look at the picture on the placement and my advice is to put a glove covered hand over the clip for when it pops off (otherwise you could hurt something or someone)


Upper dust cap


Remove guide bolt

Remove the caliper guide bolts
3. Remove the 2 plastic covers from behind the caliper to expose the guide bolts. I just use a small screwdriver to pry them off. (You could use your fingernail, but as I'm sure you've noticed at this point everything is quite covered in brake dust).
4. Using the 7mm allen socket, remove the two guide bolts holding the caliper on. You can pull them all the way out to clean them and inspect them for proper operation.


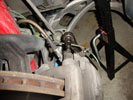
Sensor line


Everything disconnected

Disconnect the brake pad wear sensor (only on the front drivers side)
5. If you're replacing your pads before the brake pad sensor went off, you will need to preserve the existing one. Either way, disconnect the brake pad sensor from the bleeding nipple and plastic clip above the rotor. Otherwise, it will surely brake once you've popped the caliper off.


Remove pads from caliper


Make sure the caliper is supported

Remove the caliper and brake pads
6. Remove the caliper from the carrier. While holding the caliper, use a small screwdriver to remove the the brake pad sensor. It is just held in place with a small metal clip, so it will eventually come out. I also recommend spraying some brake cleaner in there to help loosen things up.
7. Remove the brake pads from the caliper piston and set aside.
8. Depress the piston back into the caliper. This can be done using a C-clamp, special tool you can rent at the local auto parts store, or just by hand (if you're strong enough). This is due to the fact that the caliper is further out since the pads have worn away. In order to make the new pads fit over the rotor, this step is manditory.
9. Make sure that the caliper is properly supported. DO NOT LET IT HANG BY THE BRAKE LINES. I just used a spare floor jack since they're quite heavy, but feel free to innovate.


Remove bolts holding the support bracket
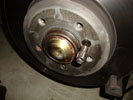

Remove rotor set screw
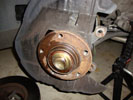

Clean up the hub

Remove the caliper support bracket and brake rotor
10. Using a 17mm socket or wrench, remove the 2 bolts holding the carrier onto the assembly. Take it off and set it with the caliper. Take a moment to clean where the pads are held by the carrier.
11. Using a 6mm allen socket, undo the set screw on the rotor. I always spray a little PB Blast on the hub and the set screw to make things easier to come apart. Note: I recommend cleaning up the set screw and applying some anti-sieze to make things come apart easier next time.
NOTE: The emergency brake MUST be off in order to remove the rotor! Make sure it's not engaged!
12. It is most likely that the rotors will be difficult to get off so use the rubber mallet to loosen it. It may take quite a few good whacks before it will come off, but I promise it eventually will. If you're never going to use the rotor again, feel free to innovate or use a bigger hammer.
13. Clean up the hub and apply some anti-sieze to make the next brake change easier.


My products in the garage


Caliper carriers
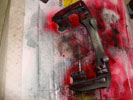

Spray some anti-squeal on the support bracket where the pads sit
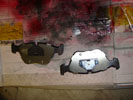

New pads
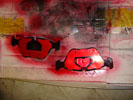

New pads coated in anti-squeal
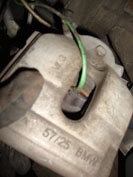

Pad wear sensor replaced


Clean, lubricate, and install new pads
14. Take the new pads and lubricate the mating surfaces with some anti-squeal compound. I also recommend lubricating the caliper carrier where the pads rest. If not applied, your brakes can be noisy... so go ahead and lube it up.
15. The pad with the three metal prongs goes back into the caliper piston so put it in. Make sure that you reinstall/replace the brake pad wear sensor as well (for the front driver's side).


Put the pad on the carrier first


Then put the caliper onto the new rotor
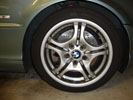

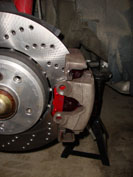
Finished look
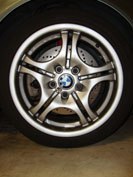

Finished look

Reassemble everything
16. Put the rotor back onto the hub and tighten the set screw it to 12 ft-lbs.
17. Put the carrier back on and tighten the 17mm bolts to 81 ft-lbs.
18. To reinstall the caliper, first set the other pad onto the caliper support bracket and then simply put the caliper with the other pad already installed over it. Tighten the 7mm allen bolts with the allen socket to 22 ft-lbs.
19. Using just your hands, snap the anti-rattle clips back onto the calipers.
20. Put the wheels back on (put some anti-sieze on the rotor hat if you had some trouble getting your wheels off before) and torque down your lug nuts to 88 ft-lbs after safely lowering your car.
21. Admire the finished product!

Brake Bedding Procedure

I can't stress how important it is to properly bed your brakes. This will put a small film of the pad onto the rotor to improve performance all around. I've added a link by Dave Zeckhausen who explains it better than I can, so please take a look and follow the directions: http://www.zeckhausen.com/bedding_in_brakes.htm

Conclusions

WARNING: When you first use your brakes, you may have to push the pedal a few times to get them to firm up, this is normal since we pushed the piston all the way back into the caliper. Remember that at first your car will not stop like it has been due to the coating on the rotors and the fresh pads. Make sure that you are cautious as you take her out for the first spin. Take it easy and after you've driven a bit to let all of the protective coating to be worn off the rotors, bed the brakes properly in order to have them operate as they were designed.

This is a simple do-it-yourself job and you should be proud of yourself for saving a couple hundred bucks. I hope you took some of that money and invested it well into some quality pads and rotors. Remember that brakes and tires will most likely safe your life, so don't go cheap. Happy motoring!


© 2001-2018 Bmw330ci.net
Disclaimer
This site is not affiliated with BMW NA or BMW AG. The BMW name, trademarks, and logos are the registered property of BMW AG.
All product manufacturer logos are property of their respective manufacturer.