Do-It-Yourself information for the modifications I've completed

Do-It-Yourself information for essential wear and tear items

Articles covering all the ways to maintain your car

All about the BMW 330ci

Various links that I've found valuable

A few pictures of my car and some others

Complete Cooling System Overhaul

Warning!
The information provided at "Bmw330ci.net" web site is "as is" with all faults and without warranty of any kind, expressed or implied, including those of merchantability and fitness for a particular purpose, or arising from a course of dealing, usage or trade practice. "Bmw330ci.net" web site nor it's owner/creator, can not and does not provide any warranty, expressed or implied, about the accuracy or use of information found on "Bmw330ci.net" web site. The user assumes that risk.

THE USE OF THIS INFORMATION IS FOR YOUR REFERENCE ONLY. BMW330CI.NET AND ITS OWNER/CREATOR DISCLAIM ALL LIABILITY FOR DIRECT, INDIRECT, INCIDENTAL, OR CONSEQUENTIAL DAMAGES OR INJURIES THAT RESULT FROM ANY USE OF THE EXAMPLES, INSTRUCTIONS OR OTHER INFORMATION ON THIS PAGE.

Difficulty
A complete cooling system overhaul is a more difficult DIY. You will need to lift at least the front of the car to get the job done. You also need to work in tight spaces and may have difficulty getting some things apart based on the mileage of your car. It isn't difficult, but may take you a couple of hours to get everything apart and back together again successfully. If you have an automatic transmission, the removal of the fan will be different as well as some other steps, please reference some other material for proper removal and installation.

Cooling System Overhaul Discussion
Many of you know that the cooling system is weak on our cars. There are many people that have water pump failure as well as their expansion tanks, which leads to overheating (and many more problems after that). Therefore, in the name of preventative maintenance, I'm changing mine at 90k miles. This way I don't have to worry or be stranded on the side of the road. For the discussion about what water pump, the old composite OEM pump lasted 90k miles with no issues, so I have no issues with putting another one in. If you want to go with a better one that costs, that's up to you. Everyone has their own opinions, this is mine.

Tools Needed
Set Of Low Profile Ramps (To lift the front end of the car enough to drain the block)
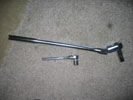
Flexible Head Ratchet (This will help to loosen the engine block drain bolt, you can also get in a 1/4" ratchet as well)
3 Feet Of Flexible Hose 1.5" Diameter Or Greater (This will be used to run the coolant away from the engine block and your face and into the bucket.)
Large Phillips Screwdriver
Various Sockets, Extensions, and Wrenches
Rubber Mallet
Large Bucket (At least 2 gallons capacity)
Funnel
T25 And T50 Torx Bits

Parts Needed

(For those of you looking for a good deal on this whole kit, check out Tischer BMW's online deal here. They are offering free shipping for the kit and they are where I go to for my OEM part needs)
Water Pump (Part # 11-51-7-527-910) $90
Crush Washer (Part #07-11-9-963-200) $0.30
Temperature Sensor (Part #13-62-1-433-077) $19
Radiator Cap (Part #17-11-1-742-231) $14
Upper Radiator Hose (Part #17-12-7-510-952) $24
Lower Radiator Hose (Part #11-53-1-436-408) $21
Expansion Tank (Part #17-11-7-573-781) $61
Thermostat (BMW P# 11-53-7-509-227) $60
Bmw Coolant (Part #82-14-1-467-704) $15
2 Gallons of Distilled Water (These can be found at any supermarket for under a dollar each)
1 Black Zip Tie (roughly 3-4 inches long)

Table Of Contents:
1. Drain The Old Coolant
2. Remove the Hoses and Expansion Tank
3. Replace The Thermostat
4. Replace The Water Pump
5. Install New Hoses and Expansion Tank
6. Bleed And Refill Coolant

1. Drain The Old Coolant

Safely lift the front of the car
1. Using a lift or a floor jack with ramps, lift at least the front of the vehicle.
Instructions for jacking up your car can be found here. This can be a very dangerous step, so make sure that the car is properly secured before ever getting under it. Never get under a car that is just supported by a jack!
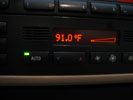

Turn on the heater

Turn on the heater to 91 degrees at low fan speed
2. Turn the ignition on, but do not start the car. Set the heater to 91 degrees and the fan on it's lowest setting. (This will allow us to get all the coolant out of the heater core and we will turn if off once we have completed draining the coolant)


Remove the radiator cap and open the bleeder screw


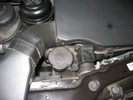
Remove the radiator fill cap

Locate radiator fill cap and loosen the bleeder screw
3. Make sure the car has cooled off! DO NOT OPEN THE FILLER CAP IF THE ENGINE IS HOT! (Hot coolant and steam will hurt when it touches your skin, and I don't think I have to say anything more) Locate the coolant fill cap and take it off.
4. Carefully loosen the bleeder screw with the large phillips head screwdriver. Since all of these parts are made of plastic they can easily be damaged (We will be replacing this so don't worry too much).


Remove the splash shield


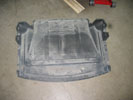
The splash shield

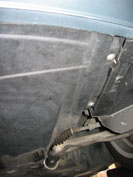
Remove the splash shield underneath the engine
5. Using a phillips screwdriver, loosen the seven screws and take off the engine cover. (Note: the screws won't come out, they will stay in place)


Remove the splash shield


Remove the splash shield

Locate and drain the coolant reservoir and radiator
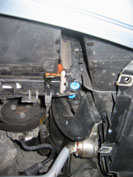
6. Locate the two drain screws. They will be blue in color and should be almost directly under where the radiator filler cap is. These are on the drivers side of the car.
7. Place the bucket underneath the first drain plug (the one closest to the ground and the front of the car). Remove the screw carefully with a phillips screwdriver and let all of the coolant drain out. Once again, remember to be careful with the plastic screws so that they do not get damaged! (These we are not replacing)
8. Place the bucket underneath the second drain plug. Open the screw carefully, but do not remove it, with a phillips screwdriver and let all of the coolant drain out.


Ratchets that will fit to remove the engine block drain bolt
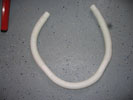

The flexible hose
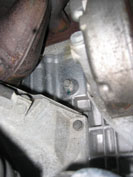

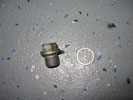
The engine block drain plug
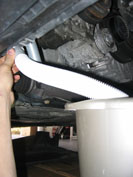

The flexible hose in action

Locate and drain the engine block coolant
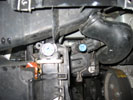
9. Find the engine block drain plug. Look on the passengers side of the engine block before the front axle. Look at the pictures to find out if you're looking at the right bolt.
10. Place the bucket beneath the drain bolt. Using either a 1/4" ratchet or a larger pivoting head ratchet, slightly loosen the 13mm bolt until you can loosen the rest of it by hand.
11. Get the 3 feet of flexible hose and put on end into the bucket and one end over the engine block drain plug. With the hose in place, quickly remove the bolt. Let the bolt and the fluid flow down the hose into the bucket. (Using the hose will prevent a huge mess being made and I highly recommend it!)
12. Once the liquid has stopped coming out of the car, you can turn off the ignition so we're not wasting the car's battery.


The engine block drain plug and new crush washer
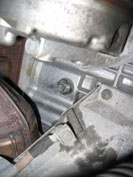

The engine block drain plug

Replace the engine block drain plug with new crush washer
12. If the old crush washer didn't come off with the bolt, make sure you detach it from the engine block. Place the new one on the plug and hand tighten it into the engine block.
13. Tighten the drain plug until the washer is being engaged. Go a little bit further to ensure that it is snug but do not over tighten it. The torque spec is 18 ft-lbs, but good luck getting any kind of torque wrench in there.


2. Remove the Hoses and Expansion Tank
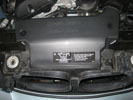


Remove the three plastic rivets
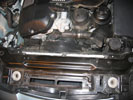

Intake tubing removed

Remove the intake ducting
14. Using a screwdriver pry up on the three plastic rivets and take them out. Remove the ducting from the top of the radiator. Be careful with the rivets, because they will break.
15. Remove the neck from the air box by squeezing on the two vertical sides of the ducting.


Remove the two bolts and clamp holding the air box down
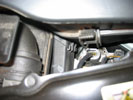

You can remove the other ducting as well
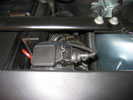

Remove the MAF connector
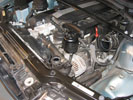

We now have plenty of room to work

Remove the air box
16. Remove the two 13mm bolts holding the air box down.
17. Loosen the 6mm clamp that is holding the intake tubing to the air box and remove it from the air box.
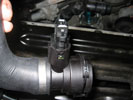
18. Carefully lift up on the metal clip for the MAF sensor. Once it is up, remove the connector and set it out of the way.
19. If you want to you can remove the lower ducting on the air box if you want. I simply left it there.
20. Remove the air box and admire all of the room we have to work, which we will need all of it.


Remove the two connectors on the radiator fan
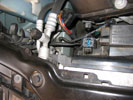

Remove the T25 screw on the passengers side
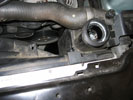

Undo the plastic rivet on the drivers side
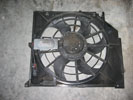

The radiator fan removed

Remove the radiator fan
(Note: Automatic transmission cars have a mechanical fan and the removal is different. These directions are for manual transmission cars. Please consult a manual or another source for automatic transmission fan removal.)
21. On the passenger side of the car, remove the wires and the T25 Torx screw from the radiator fan. (Pictures are shown from the direction of the engine).
22. On the drivers side remove the plastic rivet with a screwdriver.
23. Carefully remove the radiator fan by pulling it straight up. (When putting it back into the engine bay, make sure the bottom clips are holding it securely. It will make sense when you are looking at it.)


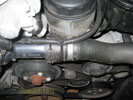
Remove the zip tie on the upper radiator hose
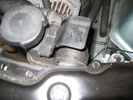

Unclip the larger connector to the expansion tank
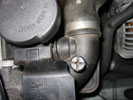

Unclip the smaller connector to the expansion tank
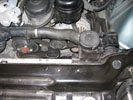

Unclip the connector on the thermostat
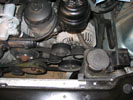

Remove the upper radiator hose

Remove the upper radiator hose
24. Using a scissors, cut off the zip tie holding down the thermostat wire to the upper radiator hose (we will replace that at the end).
25. Using a standard screwdriver, wedge up and unclip the bigger and smaller (towards the rear of the car) connectors that lead into the upper radiator hose. You can look at the new upper radiator hose to make sure you have them both.
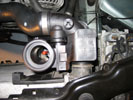
26. Unclip the connector that attaches to the thermostat, which is right in front of the oil filter housing.
27. Remove the upper radiator hose by pulling on the two ends away from where they are connected. It may take some wiggling and pressure but this one isn't that difficult. Brute strength will remove it just fine.


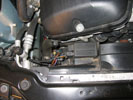
Locate the temperature sensor


Unclip the sensors connector
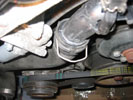

Unclip the connector to the thermostat
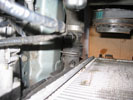

Unclip the connector to the radiator
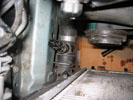

You can remove the sensor if you feel you need it to get a better grip
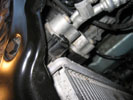

Reattach the T25 screw to keep the radiator in place

Remove the lower radiator hose
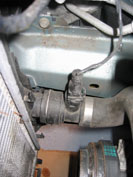
27. Locate the temperature sensor on the lower radiator hose on the passengers side of the radiator near the bottom of the car.
28. Just as with the MAF sensor clip, remove it and place the wire away.
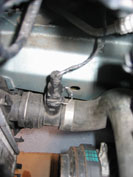
29. Unclip the connectors to the thermostat as well as the radiator.
30. To keep the radiator in place while we remove the lower radiator hose, place the T25 screw back in place that we removed earlier. If we don't do this, the radiator will not stay in place and will shift around as the hose is pulled off. (You can also remove the temperature sensor if you feel it will help you get better leverage by squeezing on the two side tabs and lifting up.)
31. First pull the lower hose off from the thermostat. Now comes the hardest part of the whole DIY. Depending on your miles the hose may be stuck on to the radiator quite well. The best way to remove it is with brute strength. I removed it from the top of the car by leaning over and pulling. It may seem like it won't come off, but trust me it eventually will. Just keep pulling and it will eventually come off. You can try to get better leverage, but I found brute strength the best way.


Unclip the heater core hose


Remove the heater core hose
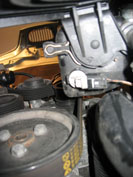

Disconnect the connector to the level sensor
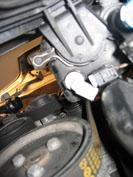

Rotate the level sensor towards the rear of the car and remove it
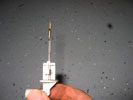

The level sensor
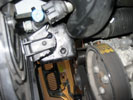

Detach the clip on the bottom of the expansion tank

Remove the expansion tank
32. Unclip and remove the heater core hose (attaches at the rear bottom of the expansion tank).
33. Disconnect the electrical connector from the coolant level sensor. Rotate it towards the rear of the car and then pull it down to remove it. Be very careful with the sensor since it is fragile and can be easily damaged.
34. Pull off and remove the U clip at the bottom of the expansion tank. We will need it for the new one so set it aside.
35. Now the second most difficult part of the whole DIY. First make sure everything is disconnected from the expansion tank! Take a socket extension (6" or so with a socket on the end) and place the socket on the bottom of the expansion tank. Take a rubber mallet and pound on the extension (as if you were hammering a nail in the bottom of the expansion tank) until it pops up. You will know it's disconnected when you are showered with coolant. It will eventually come off so keep pounding until you do.


3. Replace The Thermostat

(Note: These pictures are of when I replaced my thermostat awhile ago. Therefore they may not show the hoses removed, but the process is exactly the same.)
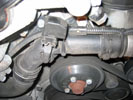

Remove the electrical connections from the thermostat
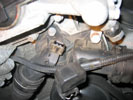

Remove the bolts on the thermostat

Remove the wire on the thermostat
36. Carefully remove the wire attached to the thermostat.
37. Remove the one 13mm bolt on the upper right part of the thermostat.
38. Carefully remove the three 10mm bolts on the top and bottom of the thermostat.


The thermostat removed


The new thermostat

Remove the thermostat and install the new one
39. Clean off the surface where the thermostat gasket attaches to the engine block. Also apply some coolant to the new thermostats rubber gasket.
40. Place the new thermostat on the engine and tighten the thermostat bolts to 7 ft-lbs (10 N-m). Remember to do a star pattern crossing the thermostat to ensure that they are properly tightened.


4. Replace The Water Pump


Remove the dust cap on the tensioner
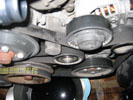

The dust cap is removed
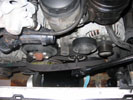

Using a large ratchet carefully loosen the belt and remove it from the tensioner

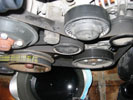
Remove the serpentine belt
41. Using a small flat head screwdriver pry off the dust caps on the two tensioners. Use a stubby screwdriver and be careful not to hit the radiator when you're prying. (They will most likely fly off into your engine bay, so be alert!)
42. Stop and make a quick diagram of how the belts pass around the pulleys so when you put them back on, it will work like it used to!
43. Using the T50 torx socket, rotate the serpentine belt tensioner clockwise. I used a 1/2" breaker bar to give myself better leverage to get the job done. I found it more useful to pull up the wrench to release the tension. Be extra careful with this tensioner to make slow movements, because it will snap back with a lot of force! Work Slowly And CAREFULLY!


Loosen and remove the four water pump pulley bolts
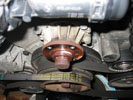

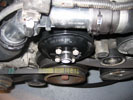
The water pump pulley removed

Remove the water pump pulley
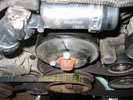
44. Loosen and remove the four 10mm bolts holding the water pump pulley on.
45. Carefully remove the water pump pulley. If it is seized on use some WD-40 (don't get any on the belts) on the pulley and wait until it comes off easily. (If you try to pry too hard you will crack it and it will need to be replaced. I know from experience)


Loosen and remove the four water pump nuts


Better view of the nuts

Install the air box screws and tighten them both evenly until the water pump comes free


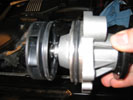
The old water pump

Remove the water pump
46. Loosen the four 10mm water pump nuts. (They are just pumps since the pump installs onto studs, so be careful you don't lose them.)
47. Take the two air box 10mm bolts and thread one of them into the hole on either side of the water pump. Then carefully drive the bolts in evenly until the water pump separates from the engine block. This will prevent damaging the engine block itself.
48. Remove the old water pump.


Clean the surface of the engine block where the water pump rests


Lubricate the new water pump seal

Reinstall the water pump nuts

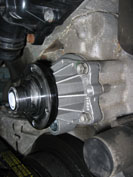
Install the new water pump
49. Clean the surface where the new pump will mate with the engine block. Also make sure to use some coolant to lubricate the new water pump's seal.
50. Reinstall the water pump and reattach the 10mm nuts to the engine block. Remember to torque them in a star pattern so that it is evenly torqued. Tighten the nuts to 89 inch-lbs (10 N-m). Note that this is inch pounds and not foot pounds, so it is roughly 7 ft-lbs.


Attach the pulley and finger tighten the bolts


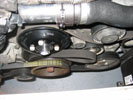
Reroute the belt

Loosen the tensioner and reinstall the belt


Replace the dust cover


Torque the pulley bolts down

Reinstall the pulley and belt
46. Replace the water pump pulley and finger tighten the bolts holding it on.
47. Carefully reroute the serpentine belt the same way as it did before. Using the T50 torx socket, rotate the serpentine belt tensioner clockwise and replace the belt. Be extra careful with this tensioner to make slow movements, because it will snap back with a lot of force! Work Slowly And CAREFULLY!
48. Replace the dust cover on the tensioner.
49. In a star pattern tighten the water pump pulley bolts to 89 inch-lbs (10 N-m). Note that this is inch pounds and not foot pounds, so it is roughly 7 ft-lbs.


5. Install New Hoses and Expansion Tank
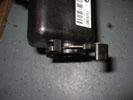

Replace the clip on the new expansion tank
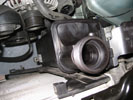

Install the new expansion tank
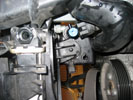

Reconnect the bottom expansion tank connector
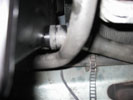

Reinstall the heater core hose
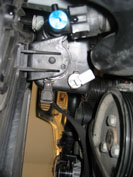

Reinstall the level sensor
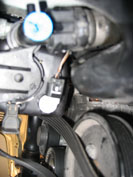

Reattach the level sensor wire

Install the new expansion tank
50. Replace the clip from the bottom of the old expansion tank and place it on the new expansion tank. Take some coolant and lubricate the mating surfaces of the expansion tank so it will install easier.
51. Carefully line up and push the new expansion tank down. Once it is seated properly, secure the clip on the bottom.
52. Reinstall and re clip the heater core hose.
53. Reinstall and reconnect the level sensor.


Line up and install the upper radiator hose
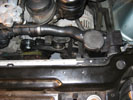

Slide down the connector clips once they are in place
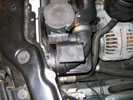

Another view of the upper radiator hose
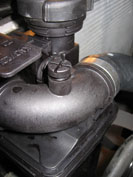

Don't forget to reopen the bleeder screw for when we add coolant again
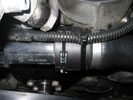

Re-zip-tie the wire onto the thermostat

Install the upper radiator hose
54. Lubricate both inside ends of the radiator hose and their respective mating surfaces with coolant so they will slide on easily.
55. Reattach the hose and when they are properly seated, push down the clips to reattach the hose.
56. Remember to reopen the bleeder screw on the hose for adding coolant later.
57. Taking a new zip tie, zip tie the thermostat wire back onto the upper radiator hose.


Reinstall the temperature sensor


Replace the lower radiator hose
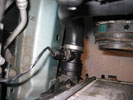

Reconnect the temperature sensor wire

Install the lower radiator hose
58. Lubricate the O-ring on the new temperature sensor with coolant and install it into the new lower radiator hose.
59. Lubricate both inside ends of the hose and their respective mating surfaces with coolant so they will slide on easily.
60. Reattach the hose and when they are properly seated, push down the clips to reattach the hose. I found it easiest to reinstall the hose from underneath the car where I could get better leverage.


Remove the T25 screw from the radiator
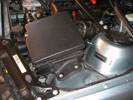

Reinstall the air box
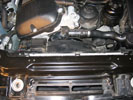

Reinstall the radiator fan
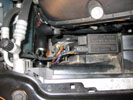

Reinstall the radiator fan connectors

Reinstall the air box and radiator fan
61. Remove the T25 screw from the radiator if you installed it earlier.
62. Reinstall the air box and two 10mm bolts, reconnect the MAF sensor and intake hose (tighten the 6mm hose clamp).
63. Reinstall the radiator fan remembering to install the T25 screw and the plastic rivet. Also reconnect the electrical connections to the fan.


6. Bleed And Refill Coolant


Distilled water, coolant, and bucket
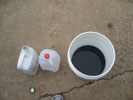

Mix them together
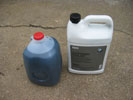

Pour them in the original jugs

Mix the coolant with the distilled water
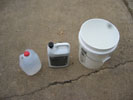
64. In your bucket, mix the entire gallon of BMW coolant with a gallon of distilled water. I choose to refill the containers with the coolant for easier pouring. Make sure that it is mixed well.


Replace and tighten the radiator and expansion tank drain plug


Turn on the heater to 91F

Replace the engine block drain plug with new crush washer
65. Tighten down the blue drain screws by hand and then a little bit more with the screwdriver. Do not over tighten them since it is plastic and can break.
66. Turn the ignition on, but do not start the car. Set the heater to 91 degrees and the fan on it's lowest setting. This will be used for bleeding air out of the coolant system.


Add coolant until only coolant comes out of the bleeder screw
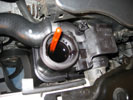

The expansion tank will appear full

Pour the new coolant into the coolant filler cap
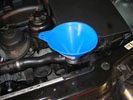
67. Slowly poor the coolant into the coolant reservoir through the filler neck using the funnel. Keep adding until you see coolant come out of the bleeder screw. (Note that the level indicator in the reservoir will indicate that there is too much coolant in the system, but this is okay, it will go down after you drive it the first time.) Tighten down the bleeder screw (do not over tighten) and replace your coolant filler cap tightly.


Set the thermostat to give out heat


Watch the temperature gauge carefully

Turn on the car and check for leaks
68. Turn on the car and examine all of the places we worked for leaks. If there are no leaks, then take the car for a drive to bring the car up to temperature.
69. Place the temperature at 91F with full fan and that everything is set up right to get heat out in the car. If you do not get heat as the car heats up, then you have air in the system and it needs to be rebled.
70. Make sure you watch the temperature gauge carefully. If the car starts to overheat, make sure you turn it off immediately (safely of course) and re bleed the system.


Remember to replace the splash shield

All done!

After the engine cools down, check the coolant level
71. Make sure the engine is cooled down! Check the coolant level, and add so that the float's second notch is slightly below the filler neck.
72. Check for leaks one more time and replace the splash shield under the car. Make sure the screws are tight so it doesn't come down.
73. Take a rest and enjoy your hard work!
74. Be friendly to the environment and properly dispose of your coolant. Go to your local auto parts store or mechanic.


Conclusions

This is a more complex do-it-yourself job, but now you don't need to worry about your cooling system for a long time. Many say that preventative maintenance is pointless, but I'd rather not be stranded on the side of the road. You can now keep driving without that worry in the back of your mind! Happy motoring!

© 2001-2018 Bmw330ci.net
Disclaimer
This site is not affiliated with BMW NA or BMW AG. The BMW name, trademarks, and logos are the registered property of BMW AG.
All product manufacturer logos are property of their respective manufacturer.