Do-It-Yourself information for the modifications I've completed

Do-It-Yourself information for essential wear and tear items

Articles covering all the ways to maintain your car

All about the BMW 330ci

Various links that I've found valuable

A few pictures of my car and some others

Changing Your Front Control Arms and Bushings

Warning!
The information provided at "Bmw330ci.net" web site is "as is" with all faults and without warranty of any kind, expressed or implied, including those of merchantability and fitness for a particular purpose, or arising from a course of dealing, usage or trade practice. "Bmw330ci.net" web site nor it's owner/creator, can not and does not provide any warranty, expressed or implied, about the accuracy or use of information found on "Bmw330ci.net" web site. The user assumes that risk.

THE USE OF THIS INFORMATION IS FOR YOUR REFERENCE ONLY. BMW330CI.NET AND ITS OWNER/CREATOR DISCLAIM ALL LIABILITY FOR DIRECT, INDIRECT, INCIDENTAL, OR CONSEQUENTIAL DAMAGES OR INJURIES THAT RESULT FROM ANY USE OF THE EXAMPLES, INSTRUCTIONS OR OTHER INFORMATION ON THIS PAGE.

Difficulty
Changing out your control arms and bushings isn't that hard, but after a lot of miles they can be pretty siezed on. Therefore, it takes some effort and technique to seperate the ball joints. Other than that it's not that difficult and I would definitly say it's a do-it-yourself project.

Choosing the Control Arms and Bushings
If you've done your research, you'll find a ton of people out there that will tell you about all the aftermarket choices for control arms and bushings. I am a big fan of the OEM feel and I do not want too harsh of a ride for my daily driver. Therefore, I decided to go with the OEM ZHP control arms (with upgraded ball joints as we'll see later) and OEM bushings. I know there may be better long lasting bushings out there, but OEM are good enough for me. There are a lot of people that have headaches with aftermarket bushings, so I decided to go with OEM and forget about it. Yes, I may need to change them again in 60k, but for me that's not that big of a deal.

So when you're taking a look you may notice that the ZHP control arms cost a lot more than the alternatives like Meyle. I was going to go for Meyle but I found a great deal on the ZHP arms that made the decision for me. If you're looking for the best handling, take your time and shop around.

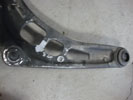
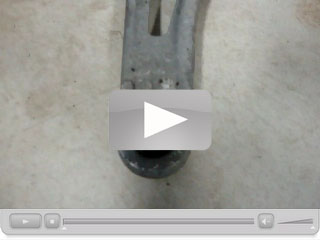
Here's a quick video showing the difference between brand new OEM ZHP control arms and the orginial ones off my sport package coupe at 100k.
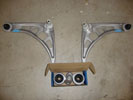

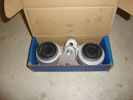
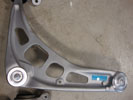
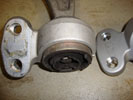
New control arms and bushings

OEM Bushings

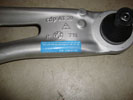
Control arm

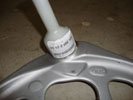
Ball Joint

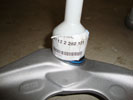
Ball Joint

Old vs new

Non ZHP ball joints

ZHP control arm ball joints

Download Description

BMW Control Arm replacement Documentation Part 1 (116K)

This is BMW's instructions for replacing your control arms and bushings. Take a read here if interested before starting your DIY. The biggest thing to note is the 290.0+-1mm for the bushing. This will all make sense later.

BMW Control Arm replacement Documentation Part 2 (223K)

BMW Control Arm replacement Documentation Part 3 (32K)

Tools Needed
Torque Wrenches
Screwdrivers
Allen Wrenches (5mm and 6mm)
Various Sockets and Wrenches
Penetrating Oil (This will help do some of the work for you)
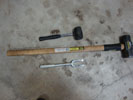
Pickle Fork (Can be rented from your local auto parts store for free)
Rubber Mallet and a Sledge Hammer (I used a 10lb to get the job done quickly)

Parts Needed
BMW OEM ZHP Control Arm Left (BMW P# 31-12-2-282-121) $200
BMW OEM ZHP Control Arm Right (BMW P# 31-12-2-282-122) $200
BMW OEM Hex Bolts x4 (BMW P# 33-30-6-760-652) $4
BMW OEM Self Locking Hex Nuts x2 (BMW P# 31-10-6-774-714) $4
BMW OEM Self Locking Hex Nuts x2 (BMW P# 32-21-6-769-539) $4
Lemfoerder Control Arm Bushings with Carriers (P # 31-12-6-757-623) $93
Anti-Sieze Compound (To make the job easier next time)

Instructions

Safely lift at least the front of the car
1. Using a lift or a floor jack with ramps lift at least the front of the vehicle. Instructions for jacking up your car can be found here. This can be a very dangerous step, so make sure that the car is properly secured before ever getting under it. Never get under a car that is just supported by a jack!
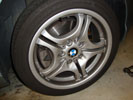

Remove the front wheel
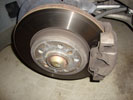

Remove the front wheel

Remove the front wheels
2. Using a 17mm deep socket with an impact wrench or hand ratchet, remove the lugnuts and set your wheels aside. If your alloys are siezed onto your brake rotors, sit down on your butt and give the sidewalls of the tires a good kick until it becomes loose. If they have siezed on, make yourself a note to add some antisieze lubricant to the brake rotor mating surface before reinstalling the wheels.


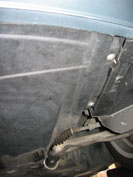
Remove the splash shield


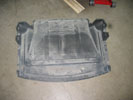
The splash shield
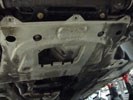

Remove the support brace

Remove the splash shield and support brace
3. Using a phillips screwdriver, loosen the seven screws and take off the engine cover. (Note: the screws won't come out, they will stay in place)
4. Using a 16mm socket, remove the eight bolts holding the support plate on.


Remove the support brace

Disconnect Xenon leveling screw from the control arm
5. Using a 13mm wrench, remove the xenon headlight leveling arm from the control arms. Failure to remove this will involve breaking something that will be a pain to replace. This is a critical step not to miss. Make sure everything is well out of the way.


Disconnect the sway bar end-link


Remove the bushing
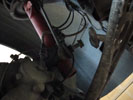

End link disconnected

Remove the front sway bar
Note: You may be able to skip this step if you're super adept, but for me the few minutes to do this makes all of the difference in the world

6. Using a 13mm and a 17mm wrench loosen the sway bar end link from the sway bar. Just use the 17mm wrench to hold everything and loosen with the 13mm nut.
7. Using a 13mm wrench loosen the sway bar bushings from the frame. The sway bar is quite heavy, so make sure you're ready to support it! We now have enough room to get everything done.


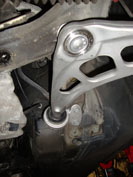
Outer Ball Joint


Outer Ball Joint


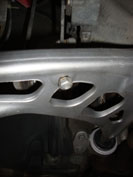
Inner ball joint
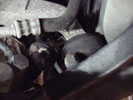

Inner ball joint close up

Remove the ball joint nuts
8. Using a 18mm wrench remove the outer ball joint locking nut. I recommend spraying some PB Blast on it and letting it sit for a couple of minutes before beginning as things can be pretty siezed on after awhile. If it won't come off you will need to use a 5mm allen to hold the ball joint and use a wrench to loosen the nut (see below for how to accomplish this).
9. Using a 22mm wrench remove the inner ball joint locking nut. I also recommend some PB Blast and if it rotates you will need a 6mm allen to hold it in place. There isn't a lot of room here, so it will just take some time to get the ball joint nut off. If you have a 22mm ratcheting wrench then you'll probably thank yourself for buying it at this point... if you don't have one like me you'll be here for awhile.


Tools needed


Outer ball joint


Outer Ball Joint angle
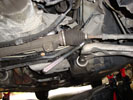

Inner ball joint angle
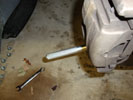

Inner ball joint angle
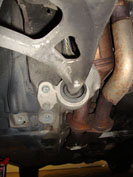

Remove the bushing bracket

Seperate the ball joints using the pickle fork and disconnect bushing bracket
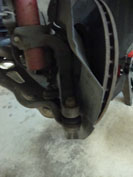
10. So now the nuts are off but the control arm is siezed on by the ball joints. This is where the pickle fork comes into play. First get the proper angle on the pickle fork (note the pictures) and pound it into place with the rubber mallet. If you're really lucky it will seperate nice and easy, for me it didn't want to play nice.
Note: Please be careful while using a large hammer on the pickle fork to not damage the car or yourself. Make sure to wear safety glasses and other personal protective gear.
In order to help things along, i broke out my 10lb sledge hammer. It only took a couple of good whacks before they will seperate. If it's been a few good whacks, spray some PB blast, wait 5 minutes, and repeat. Since we're not reusing the ball joints, it doesn't matter if they get damaged. Trust me they will eventually seperate.
11. Using a 16mm socket, remove the bushing bracket from the frame and remove the old control arm. The control arm is fairly heavy and right now only the bushing is supporting all of the weight, so be careful.


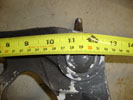
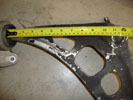
Measure to 290.9+-1mm


Measurement


Mark the new control arm
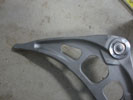

Get everything ready

Measure and the proper bushing length
12. Getting the bushing onto the control arm properly is essential. If you read the BMW documentation above you'll note that the proper length is 290.9 +- 1mm. If you take a look at the old control arm you'll notice that it's right on the money, so we need to do the exact same thing with the new control arm. Mark it with a grease pencil or equivalent.


Note the way the old bushing was installed
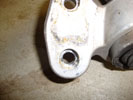

Note the bottom hole is different
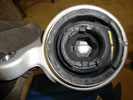
Press the new bushing on
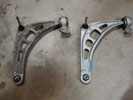

Old versus new control arms

Press bushings onto the control arm
13. Make sure that you note that the bushings are specifically designed to only go on one side one way. This is essential! If you take a closer look you'll notice the lower bolt hole is slightly differernt and it must be in the proper position when we put the new one together. So take the old one and compare and once satisfied you're correct move onto the next step.
14. Make a soap and water mixture to help the busing go on and use a rubber mallet to press the bushing onto the control arm to the proper lengh that we measured on in the previous steps. Be careful to not go too far as pulling it off isn't nearly as easy as putting it on and will most likely involve a bearing puller or another tool (not discussed in this DIY). If done properly and with precision we're ready to move on!


Attach the inner ball joint and bushing
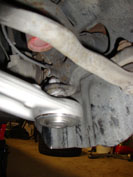

Attach the outer ball joint

Hand tighten the control arm on
15. Take the new 16mm hex bolts and attach the new bracket to the frame.
16. Bend the inner ball joint and start the nut onto the ball joint until it's hand tight. Note that it will rotate freely once it hits the locking portion of the nut, so we'll need to use the allen key to actually torque it on. I put a little bit of anti-sieze around the ball joint so hopefully if I ever have to do this again, it can be a little bit easier.
17. Do the same thing with the outer ball joint.


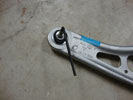
Ball joint showing allen wrench operation
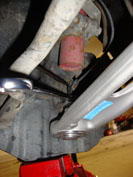

Outer ball joint tightening
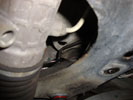

Inner ball joint tightening
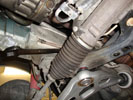

Inner ball joint again

Tighten down bushing and ball joints
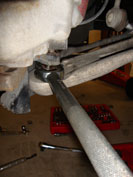
18. Note how the allen wrench must be used to hold the ball joint stationary. This is KEY! Using a 18mm wrench and the allen key, tighten the outer ball joint nut until it's fairly tight. Now we can use a torque wrench and tighten it to 48 ft-lbs.
19. Do the same thing with the inner ball joint. I could not find any reasonable way to get a torque wrench in there, so if you can good for you. I merely guessed as good as I could to the torque specification of 66 ft-lbs.
20. Tighten the bushing carrier bolts to 44 ft-lbs. If you're worried about bearing preload, you can put everything else back together and do the final torques with some weight on the wheel. If that doesn't make any sense to you, just don't worry about it.


Reattach xenon leveling sensor

Put everything else back together
21. Reattach the 13mm xenon leveling sensor nut.
22. Reattach the 13mm sway bar bushing brackets and torque them to 16 ft-lbs.
23. Reattach the sway bar end link using a 17mm wrench and a 13mm wrench and tighten to 48 ft-lbs.
24. Reattach the engine support plate and torque all the 16mm nuts to 44 ft-lbs. Reinstall the splash cover and tighten the screws.
25. Put the wheels back on (put some anti-sieze on the rotor hat if you had some trouble getting your wheels off before) and torque down your lug nuts to 88 ft-lbs after safely lowering your car.
26. Make sure you go and get a 4 wheel alignment as soon as possible. If you've got some other projects you're working on like tie rods, RTABS, etc. then wait till you've finished them all.
27. Enjoy!


Conclusions

After getting my alignment done, I can definitly tell that the steering is much more responsive and bumps don't affect the steering neerly as much. It feels like a brand new car again and if you're nearing 100k, I'd highly recommend changing things out. Furthermore, you're control arm bushings probably are shot around 60-80k, so it should be about time too. This DIY covers replacing everything and it will probably be several years before I actually get around to replacing the bushings. If your car feels like it isn't driving as nicely as it should, it may be time. This DIY has brought me a lot of joy!


© 2001-2018 Bmw330ci.net
Disclaimer
This site is not affiliated with BMW NA or BMW AG. The BMW name, trademarks, and logos are the registered property of BMW AG.
All product manufacturer logos are property of their respective manufacturer.