Do-It-Yourself information for the modifications I've completed

Do-It-Yourself information for essential wear and tear items

Articles covering all the ways to maintain your car

All about the BMW 330ci

Various links that I've found valuable

A few pictures of my car and some others

Changing Your Tie Rods

Warning!
The information provided at "Bmw330ci.net" web site is "as is" with all faults and without warranty of any kind, expressed or implied, including those of merchantability and fitness for a particular purpose, or arising from a course of dealing, usage or trade practice. "Bmw330ci.net" web site nor it's owner/creator, can not and does not provide any warranty, expressed or implied, about the accuracy or use of information found on "Bmw330ci.net" web site. The user assumes that risk.

THE USE OF THIS INFORMATION IS FOR YOUR REFERENCE ONLY. BMW330CI.NET AND ITS OWNER/CREATOR DISCLAIM ALL LIABILITY FOR DIRECT, INDIRECT, INCIDENTAL, OR CONSEQUENTIAL DAMAGES OR INJURIES THAT RESULT FROM ANY USE OF THE EXAMPLES, INSTRUCTIONS OR OTHER INFORMATION ON THIS PAGE.

Difficulty
Changing out your tie rods is similar to changing your control arms but a bit easier. Once again the hardest part is simply seperating the ball joints. However once it's done, the rest of the job is easy! This took me about 2 hours simply because I was taking my time. Now the reason why I had to replace my tie rods is because the dealership (where I took it in for an alignment) said my tie rods were siezed. I was at 100k so I just decided to go ahead and replace them. Now my entire front end should be good for another 100k.

Tools Needed
Torque Wrenches
Screwdriver
Needle Nosed Pliers
Various Sockets and Wrenches
34mm Crows Foot (Pipe wrench could work if you don't want to buy a some more tools. I also enjoy the opportunity to buy some new tools)
5mm Allen Wrench
Penetrating Oil (This will help do some of the work for you like PB Blast)
Pickle Fork (Can be rented from your local auto parts store for free)
Rubber Mallet and a Sledge Hammer (I used a 10lb to get the job done quickly)
Hack saw or dremel with metal cutting attachment

Parts Needed
Lemfoerder Tie Rod Assembly With Hardware Left (Part # 32-11-1-096-897) $75
Lemfoerder Tie Rod Assembly With Hardware Right (Part # 32-21-1-096-898) $75
Anti-Sieze Compound (To make the job easier next time)
Zip Ties (One long and one medium)

Instructions

Safely lift at least the front of the car
1. Using a lift or a floor jack with ramps lift at least the front of the vehicle. Instructions for jacking up your car can be found here. This can be a very dangerous step, so make sure that the car is properly secured before ever getting under it. Never get under a car that is just supported by a jack!
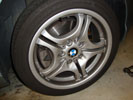

Remove the front wheel
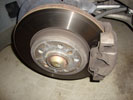

Remove the front wheel

Remove the front wheels
2. Using a 17mm deep socket with an impact wrench or hand ratchet, remove the lugnuts and set your wheels aside. If your alloys are siezed onto your brake rotors, sit down on your butt and give the sidewalls of the tires a good kick until it becomes loose. If they have siezed on, make yourself a note to add some antisieze lubricant to the brake rotor mating surface before reinstalling the wheels.


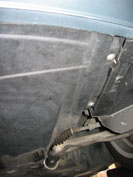
Remove the splash shield


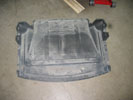
The splash shield

Remove the splash shield
3. Using a phillips screwdriver, loosen the seven screws and take off the engine cover. (Note: the screws won't come out, they will stay in place)


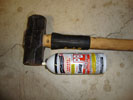
Tools needed to seperate the ball joint
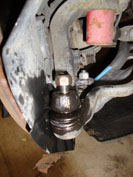

Spay some penetrating oil and loosen the nut
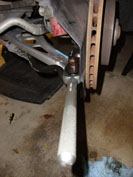

Seperate the ball joint
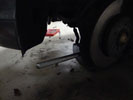

Get the proper angle

Seperate the ball joint from the steering knuckle
4. Spray some PB Blast onto the ball joint nut and let it sit for a few minutes. After you've waited a bit, get a 18mm wrench and remove the ball joint nut. If it spins then you'll need to hold the ball joint with a 5mm allen wrench (see below).
5. Make sure that the nut is still threaded on slightly, this will make sure it doesn't fall when it's seperated. We will remove this nut later.
6. So now the nut is off but the ball joints are probably siezed. This is where the pickle fork comes into play. First get the proper angle on the pickle fork (note the pictures) and pound it into place with the rubber mallet. If you're really lucky it will seperate nice and easy, for me it didn't want to play nice. Have the wheel slightly turned, but not too much or that will tend to hold the ball joint in place.
Note: Please be careful while using a large hammer on the pickle fork to not damage the car or yourself. Make sure to wear safety glasses and other personal protective gear.
In order to help things along, i broke out my 10lb sledge hammer. It only took a couple of good whacks before they will seperate. If it's been a few good whacks, spray some PB blast, wait 5 minutes, and repeat. Since we're not reusing the ball joint, it doesn't matter if they get damaged. Trust me they will eventually seperate, just give it a few good whacks.


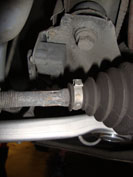
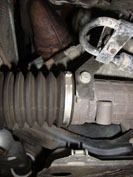
Remove band on the tie rod


Remove the band on the steering rack

Remove the bands from the dust boot
7. Using a flat head screwdriver and pair of needle nosed pliers, remove the bands holding the dust boot onto the tie rod and steering rack. We're not going to reuse them, so it doesn't matter if they get broken. We ARE going to reuse the dust boot (which are about $30) so make sure you don't damage it.


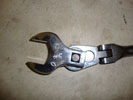
Attach the 34mm cros foot to a breaker bar
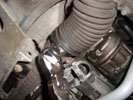

Loosen the 34mm nut holding the inner tie rod on
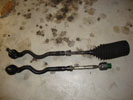

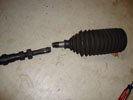
Old versus new tie rod

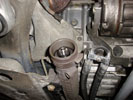
Remove the inner tie rod from the steering rack
8. Attach the 34mm crows foot to a breaker bar. Move the Using your hands, move the steering rack until the 34mm crows foot is resting on the end of the inner tie rod and loosen it up.
9. Remove the 18mm nut holding the ball joint on and remove the tie rod assembly.


Cut the old tie rod in half to re-use the old dust boot
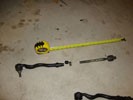

Make sure you measure the tie rod before cutting (not as pictured of course)
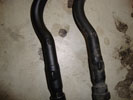

The tie rods are marked for a particular side, follow suit

Measure the old tie rod, cut it, and remove the old dust boot
10. Using a tape measure, measure the length of the old tie rod. This way we'll be able to get the alignment close for when we take the car in to get an alignment done. It doesn't have to be perfect.
11. Cut the old tie rod in half using a hack saw, dremel with metal cutting wheel, or alternative method. Make sure you're careful to not get any metal in your eyes or damage yourself. Remove the old dust boot.
12. Make sure you've got the right tie rod (they are labled left and right) and assemble the tie rod. Adjust the lengh of the assembly to be roughly that of what the old one was measured to be. Now to make sure that I don't have difficulty adjusting the tie rods in the future, I made sure to use some anti-size while threading the inner and outer tie rods together. Since the nut holds everything together, this will not affect their operation.
13. Take a 24mm wrench and tighten the assembly down so it won't move during installation.


Attach the 34mm cros foot to a breaker bar


Loosen the 34mm nut holding the inner tie rod on
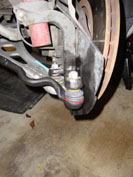

Old versus new tie rod

Install the new tie rod
14. Thread the new inner tie rod onto the steering rack by hand until tight. Grab the 34mm wrench and torque it down to 74+-7 ft-lbs. Since we're using a crows foot the torque wrench reading isn't completely accurate (do to the longer lever arm) and you could do the math or just go 81 and call it a day.
15. Attach the outer tie rod ball joint and thread the locking nut on by hand. Once it begins spinning, you're ready to go.


Tighten the locking nut onto the ball joint
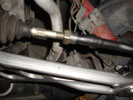

Tighten the tie rod adustment nut
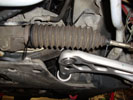

Use zip ties to reattach the dust boot

Tighten everything down
16. Using a 18mm wrench and a 5mm allen wrench, tighten down the ball joint locking nut. Once it's nice a snug, torque it down to 33 ft-lbs.
17. Take a 24mm wrench and tighten it down snug. The torque specification is 48 ft-lbs, so I just made it nice and tight. Remember that when they do your alignment, this will just end up being adjusted, the point is you don't want it loose while driving there.
18. Using two zip ties, one long and one medium, attach the dust boot. Once they're tight, cut the ends of the zip ties.


Put everything else back together
19. Reinstall the splash cover and tighten the screws.
20. Put the wheels back on (put some anti-sieze on the rotor hat if you had some trouble getting your wheels off before) and torque down your lug nuts to 88 ft-lbs after safely lowering your car.
21. Make sure you go and get a 4 wheel alignment as soon as possible. If you've got some other projects you're working on like tie rods, RTABS, etc. then wait till you've finished them all.
22. Enjoy!


Conclusions

After getting my alignment done, I can definitly tell that the steering is much more responsive and bumps don't affect the steering neerly as much. It feels like a brand new car again and if you're nearing 100k, I'd highly recommend changing things out. The only reason I changed mine was the old ones were "siezed" and even though they probably could be "un-siezed" with 100k on the ball joints, it was probably time to change them anyways. One less thing to worry about now.


© 2001-2018 Bmw330ci.net
Disclaimer
This site is not affiliated with BMW NA or BMW AG. The BMW name, trademarks, and logos are the registered property of BMW AG.
All product manufacturer logos are property of their respective manufacturer.