
![]()
![]()
Do-It-Yourself information for the modifications I've completed
![]()
Do-It-Yourself information for essential wear and tear items
![]()
Articles covering all the ways to maintain your car
![]()
All about the BMW 330ci
![]()
Various links that I've found valuable
![]()
A few pictures of my car and some others
Dropping Your Transmission & Shift Pin Service
Warning!
The information provided at "Bmw330ci.net" web site is "as is" with all faults and without warranty of any kind, expressed or implied, including those of merchantability and fitness for a particular purpose, or arising from a course of dealing, usage or trade practice. "Bmw330ci.net" web site nor it's owner/creator, can not and does not provide any warranty, expressed or implied, about the accuracy or use of information found on "Bmw330ci.net" web site. The user assumes that risk.
THE USE OF THIS INFORMATION IS FOR YOUR REFERENCE ONLY. BMW330CI.NET AND ITS OWNER/CREATOR DISCLAIM ALL LIABILITY FOR DIRECT, INDIRECT, INCIDENTAL, OR CONSEQUENTIAL DAMAGES OR INJURIES THAT RESULT FROM ANY USE OF THE EXAMPLES, INSTRUCTIONS OR OTHER INFORMATION ON THIS PAGE.
Why do you need a shift pin service?
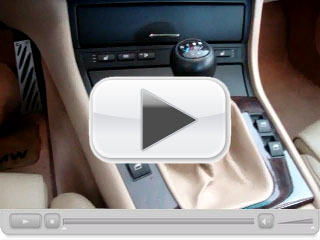
The first sign you need a shift pin service for your ZF transmission is if your shifter stays to the 5th gear gate after shifting into 5th gear. You may notice it starting when it's cold, but eventually it will happen all the time. If you want to see what it's like, check out the video below. It shows how things were with the shift pin getting stuck in the bushing and how it shifts afterwards. If you have this problem, you know exactly how frustrating it is.
Difficulty
This is probably one of the most difficult DIYs I've attempted by myself. If you had some friends to give you a hand, this could probably be done in half the time, but I took it out and put it in myself, which makes things a bit harder. I did it in a span of three days and took my time and in total it probably took me 12-15 hours. A lot of that time was spent getting it out and putting it back in. If you have a buddy and a free weeeknd, you could easily do this or a clutch jub. However, if you're just a weekend warrior, I recommend leaving this to a mechanic or a professional. If you have any hessitation, don't do it yourself.
Take a read below if you want to see how things worked out and how I
tackled my different issues.
I'm not going to use any specific mm
or sizes in this DIY but rather will guide you along the way. I will
however include all the required tools to get the job done. If you've got
an external torx set, some long socket extensions, and a good tool set you
should be fine.
| Download | Description |
| This is BMW's instructions that describe the problem and how to fix it. Take a read through this and you will learn that BMW does indeed know about the problem and you could provide this to a mechanic if you need to explain waht needs to be fixed. | |
|
|
BMW Special Tools
In order to perform the
transmission shift pin service you're going to need some tools. Some
people fashion their own out of parts and pieces around the garage, but I
decided that the real deal would probably make things easier and save me
some hassle. Therefore, I had some tools manufactured based on
another DIY out there
(Click Here For Drawings and DIY). It is an excellent DIY and I
used it as a guide as I performed mine. Once we get to this point in
the procedure, I'll simply have you follow his directions because I'm all
about not reinventing the wheel. They made the process simple and worked
great!
If you're interested in getting a set of tools made for
yourself, I recommend contacting Tom at Peterson Precision, who did an
excellent job at making mine (Email
me to get his contact information).
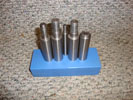 BMW Tools |
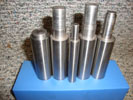 Closeup of BMW Tools |
Tools Needed
Torque Wrenches
Screwdrivers
Various Sockets and Wrenches
At lest 3-4 feet of socket extensions
(some people may want wobble or u-joint type at some point)
Penetrating Oil (This will help do some of the work for you when things
get stuck, I reccommend PB Blast)
BMW Special Tools (See above)
Hammer
Parts Needed
Repair Kit x2 (BMW P# 23-11-7-542-726) $6
Reverse Locking Pin (BMW P# 23-31-1-224-849) $6 (Optional)
5th Gear
Locking Pin (BMW P# 23-31-7-502-165) $6 (Optional)
Anti-Sieze Compound (To make the job easier next time)
Instructions
Safely lift at least the car
1. Using a lift or a floor jack lift the entire vehicle. Instructions for jacking up your car can be found here. This can be a very dangerous step, so make sure that the car is properly secured before ever getting under it. Never get under a car that is just supported by a jack!
Note: The more room you can get to work on your transmission the better,
so therefore I recommend getting some high lift jack stands or doing this
on a lift if at all possible.
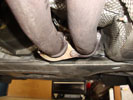 Disconnect the headers from the exhaust 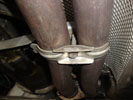 Remove the bracket from the exhaust  Remove the bracket from the transmission |
Remove the exhaust (Front First) |
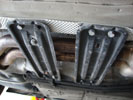 Remove the front wheel 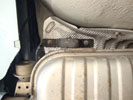 Remove the front wheel 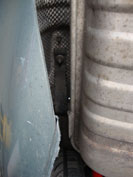 Remove the front wheel 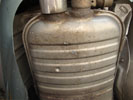 Remove the front wheel 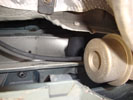 Remove the front wheel |
Remove the exhaust (Back Second) |
Conclusions
After performing the shift pin service, the car finally shifts like new again. I had been putting this off for years, but I promise you that it's totally worth it. It is quite a lot of work to replace a few bucks in parts, but if you want to finally shift like normal again, this is the fix.
Disclaimer
All product manufacturer logos are property of their respective manufacturer.