
![]()
![]()
Do-It-Yourself information for the modifications I've completed
![]()
Do-It-Yourself information for essential wear and tear items
![]()
Articles covering all the ways to maintain your car
![]()
All about the BMW 330ci
![]()
Various links that I've found valuable
![]()
A few pictures of my car and some others
UUC EVO3 Short Shift Kit + DSSR Installation (5-Speed)
Warning!
The information provided at "Bmw330ci.net" web site is "as is" with all faults and without warranty of any kind, expressed or implied, including those of merchantability and fitness for a particular purpose, or arising from a course of dealing, usage or trade practice. "Bmw330ci.net" web site nor it's owner/creator, can not and does not provide any warranty, expressed or implied, about the accuracy or use of information found on "Bmw330ci.net" web site. The user assumes that risk.
THE USE OF THIS INFORMATION IS FOR YOUR REFERENCE ONLY. BMW330CI.NET AND ITS OWNER/CREATOR DISCLAIM ALL LIABILITY FOR DIRECT, INDIRECT, INCIDENTAL, OR CONSEQUENTIAL DAMAGES OR INJURIES THAT RESULT FROM ANY USE OF THE EXAMPLES, INSTRUCTIONS OR OTHER INFORMATION ON THIS PAGE.
What is a short shifter?
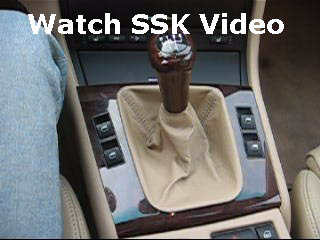
A short shifter is basically a new shift assembly that makes the distance needed to travel between gears smaller. For you to better understand this concept, I've put together this video, which shows the OEM shifter trow and slop against the UUC EVO3 Short Shifter. All in all this modification is an excellent one and I will talk about it more in the review.
Difficulty
Since this installation requires a lot of tedious work in areas where you cannot really see what you are doing, this is a fairly difficult installation. Depending how quick you are working and how fast you can get everything dissasembled, it can take from 1-4 hours. It is definitly a doable do-it-yourself and is well worth the hard work. Plus you will actually understand what is going on when you are finished.
Parts Needed

UUC EVO3 Ultimate Short Shift Kit
Double-Shear Selector Rod (DSSR is optional, but will help make your shifts more precise. See the UUC website for more information on what the DSSR does)
Tools Needed
Long and Short Flat Blade Screwdrivers
Phillips Screwdriver
Needle Nose Pliers
Circlip or Snap Ring Pliers (These are completely necessary for the installation, but they will make it much simplier. They can be purchased at your local parts store if you want to get some. They will make sense when to use during the installation)
2.5mm Allen Key (This is provided by UUC)
13mm Socket and Wrench
Micro-Torque Wrench (If you are loosening the transmission cross brace)
24mm Wrench (For adjusting the height of the shifter)
UUC Installation Instructions
Since the UUC Installation instructions are quite excellent, I will merely provide my commentary on the installation so that you can better understand the provided instructions. I also reccomend you print out your own copy from the web so that you can get bigger color pictures. These instructions can be found by clicking here.
Instructions
Lift the car and let it cool
1. Safely put your car on a lift, floor jacks, or ramps. Instructions for jacking up your car can be found here. This can be a very dangerous step, so make sure that the car is properly secured before getting under it. Never get under a car that is just supported by a jack! This is an installation, where the more room you have under the car is better!
2. Let the car sit for awhile if you have been driving it because you will be working right near the exhaust and the transmission, which get hot after use. Make sure that they are not scolding hot before you begin tearing things apart.
Remove the interior around the shift knob
3. Remove the shift boot by pulling in at the corner
4. Pull the shift knob off of the shifter. Take both hands and pull straight up, but beware since it will come off and is likely to hit you if you are right over the knob. This is an easy way to get a black eye if you're not paying attention.
5. Remove the foam underneath the shift boot and take everything out.
6. Using a phillips screwdriver, remove the center console with the window switches. They simply come unclipped underneath.
7. Remove the rubber shifter boot. It will take some finessing but will eventually come out.
Remove the selector rod
8. Since we are installing a new selector rod (the DSSR) we might as well just take the old one off now to have extra room to navigate. This is where you can use the circlip pliers if you'd like, but I found my fingers much easier to pry them off. Since UUC gave us replacement circlips, they can be damaged with no worries.
9. Once both of the circlips are removed, slide the selector rod off. Notice how the OEM selector rod is quite flimsy when compared to the DSSR. It should make sense now why it should be replaced.
Remove the OEM shifter
10. Using the needle nose pliers, stick them in as the figure shows into the two notches and rotate it to the left to release the nylon cup.
11. Remove the OEM shifter and compare it with the UUC EVO3, which is made of steel and obviously shorter (Hence the name!)
Remove the aluminum carrier
12. This is by far the most difficult step and can be a point of great frustration. The delron bushing clip must be removed in order to get the aluminum carrier out. So lets start by getting a better understanding of how the clip works. Take a look at the pictures provided and realize that it rotates upward and is being held in by that side clip. Look at the new clip that was provided and visualize how it fits into position.
13. Loosen the transmission cross-brace by about 1/4" in order to give yourself some extra room to maneuver. Use the 13mm socket and wrench. Be careful to not loosen the bolts too much or it will likely fall on you (Not good!).
14. Position yourself so that you are facing the passenger side of the car and use one of the screwdrivers (I prefer the larger one since it has more leverage, but the smaller one can be useful to initally get underneath the clip) and pry it up under the drivers side of the clip. Using as much force as you can muster, break the clip. If at first you don't succeed use more force (or get a bigger screwdriver with more leverage), since you're meaning to break it. It will eventually loosen and break.
15. Use your hand and wiggle out the clip.
16. Slide the aluminum carrier forward and remove it from the car.
17. Take a quick break since all of the hard part of the installation is done.
Install the hight adapter assembly and carrier
18. Add a drop of the loctite into the holes of the height adapter.
19. Install all 6 2.5mm hex bolts with the provided wrench. Install them loosely at first but slowly tighten them alternating between the two sides to ensure a snug and proper fit. There is no need to overtighten the bolts so just make sure they are finger tight and snug.
20. Reinstall the aluminum carrier with the installedheight adapter.
21. Retighten the 13-mm transmission cross-brace bolts. Tighten them to 15 ft-lbs (Make sure not to overtighten or some of the vibrations of the transmission will be transferred to interior. Note that 15 ft-lbs is not very tight at all)
Install the new shifter
22. Place the white ring bushing into the car so the curved side is facing up (So the the shifter can pivot on the ball).
23. Use the supplied tube of grease to lubricate the pivot ball. Use all of the grease provided and make sure that is thoroughly covered.
24. Put the shifter into the carrier. The shift knob should be bent a little toward the back and the left. This is important or otherwise, your shifter will not work properly once installed.
25. Using your circlip pliers, push the bearing and spring down and lock the circlip into place. This circlip's diameter gets smaller once you compress it with the pliers and returns to its normal diameter and locks into place when finished. Make sure that it is secured and doesn't come out.
Insert bearing liners and DSSR
26. Put the bearing liners on either side of the shifter underneath the car.
27. If you have the DSSR make sure to lubricate the ends of the rod so that they slide smothly and make for an easy installation. Also make sure to lubricate the pins themselves. This will make sure everything operates properly.
28. Install the pins through the shifter and the DSSR exactly like the directions show so that it goes pin, yellow washer, DSSR, yellow washer, circlip. The circlips will pop on with finger pressure. Make sure that the notch in the DSSR is on the bottom towards the transmission. This is essential so that the DSSR does not hit the flex disk. This is explicitly shown in the directions.
Check the operation of the shifter
29. Get into the car, push in the clutch, and shift through the gears. There shouldn't be any grinding or weird noises. You should hear the sound of precision shifting! If you have any weird noises, examine the directions again and see if you can determine where things went wrong.
30. If you so desire, change the height of the shifter using a 24mm wrench.
Reinstall the interior around the shift knob
30. Start by reinserting the rubber shift boot. Use some windex to help lubricate the shifter so that it will slide down more smoothly. It will eventually stuff down in and make a good seal. Replace the foam, reattach the center console window switches and screw it down. Install the shift boot and push the shift knob back onto the shifter (It will merely clip back into place when pushing down).
31. Safely lower your car and take it out for a drive. Enjoy the feeling of a much better shifter
Note: If you have noise while shifting, it can be one of these 5 things. Thanks go out to Rob at UUC for identifying these 5 causes. My Advice is to simply get a new OEM ZHP Shift knob which is shorter itself and weighted. This makes shifting even smoother and more precise.
1. Broken or loose internal clip. Simply pull the knob off, shake out any loose pieces, and put a single layer of electrical tape on the side of the shift lever under the knob. Do not cover the circumferential slot at the bottom nor the transverse slot at the top.
2. Wooden knobs - the wood seperates internally. Sometimes the electrical tape trick as in #1 works, sometimes not.
3. Illuminated knobs 1: the LED electronics get loose. Just like #2, the electrical tape trick might work.
4. Illuminated knobs 2: the wire or the wire connector for the knob can shift within the console and vibrate against the shifter.
5. Leather shift boot - hard to believe, but the flap inside the boot at the top where the leather folds over can resonate at a high frequency against the metal shift lever and create a loud noise. Simply flip the boot up over the knob (the frame is just a snap-fit in the console), cinch the leather flap tight with a zip tie, and clip the frame back into the console.
Review
After completing the install I can definitly say that this modification makes the 330ci seem like more of a sports car. You don't feel like you are rowing a boat when you are shifting and a majority of the shifter slop is gone. I highly reccomend if you have a manual transmission getting a short shift kit. It starts off a little notchy but give it awhile and it will shift just like it should. Thanks go out to UUC Motorwerks for another top notch product. Now that you have a new shifter installed, make sure that you are following proper shifting technique so that you're getting the most out of your new purchase. Thse directions will help you get started. Now you just need to master proper downshifting and technique, but that is a different story. Enjoy!
Disclaimer
All product manufacturer logos are property of their respective manufacturer.