
![]()
![]()
Do-It-Yourself information for the modifications I've completed
![]()
Do-It-Yourself information for essential wear and tear items
![]()
Articles covering all the ways to maintain your car
![]()
All about the BMW 330ci
![]()
Various links that I've found valuable
![]()
A few pictures of my car and some others
BMW OEM Strut Tower Reinforcement Plates Install
Warning!
The information provided at "Bmw330ci.net" web site is "as is" with all faults and without warranty of any kind, expressed or implied, including those of merchantability and fitness for a particular purpose, or arising from a course of dealing, usage or trade practice. "Bmw330ci.net" web site nor it's owner/creator, can not and does not provide any warranty, expressed or implied, about the accuracy or use of information found on "Bmw330ci.net" web site. The user assumes that risk.
THE USE OF THIS INFORMATION IS FOR YOUR REFERENCE ONLY. BMW330CI.NET AND ITS OWNER/CREATOR DISCLAIM ALL LIABILITY FOR DIRECT, INDIRECT, INCIDENTAL, OR CONSEQUENTIAL DAMAGES OR INJURIES THAT RESULT FROM ANY USE OF THE EXAMPLES, INSTRUCTIONS OR OTHER INFORMATION ON THIS PAGE.
Why add a strut tower reinforcement plates?
The strut towers are where the top of the front suspension rests. Whenever you hit a hard pothole, these towers take the brunt of the force. Over time, the steel can deform and lead to "mushrooming". There are a couple ways to prevent them, one is an expensive strut tower bar (which I also recommend), but there are reinforcement plates. These are designed from BMW as a part of the rough road package and I feel that everyone should put a pair of these on, since they are so cheap and the install is so simple. You can see a picture of the strut tower reinforcement plate below.
Difficulty
This is not really a difficult job and merely involves loosening and tightening a few bolts while using a floor jack. If you can work a wrench you can do this one as long as you have a partner to help.
Parts Needed
BMW OEM Strut Tower Reinforcement Plates (BMW P# 51-71-7-036-781) $14
Tools Needed
Floor Jack
Micro Torque Wrench (It needs to be able to do 18 ft-lbs accurately)
Torque Wrench
Various sockets and wrenches
Instructions
Safely lift the front of the car and remove the wheels
1. Using a lift or a floor jack with jack stands lift the car. Instructions for jacking up your car can be found here. This can be a very dangerous step, so make sure that the car is properly secured before ever getting under it. Never get under a car that is just supported by a jack!
2. Using a 17mm deep socket with an impact wrench or hand ratchet, remove the lug nuts and set your wheels aside. If your alloys are seized onto your brake rotors, sit down on your but and give the sidewalls of the tires a good kick until it has become unloosened. If they have seized on, make yourself a note to add some antisieze lubricant to the brake rotors before installing the wheels.
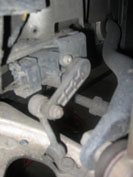 Xenon Leveling Sensor |
Unattach the passenger side xenon leveling sensor |
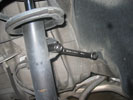 Remove the sway bar end link 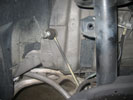 Move it aside |
Remove the sway bar end links |
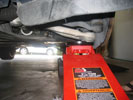 Support the front strut and control 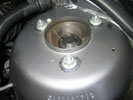 Remove the strut tower nuts |
Support and drop the strut |
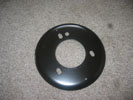 The reinforcement plates 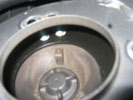 Install the support plate |
Install the reinforcement plate (You will need a partner for this unless you're very skilled) |
Tighten everything back up
11. Tighten the strut tower nuts to 18 ft-lbs.
12. Reattach the sway bar end links and tighten the 17mm nut to 48 ft-lbs.
13. Reattach the 10mm xenon leveling sensor and make sure that it is hand tight.
14. Reinstall your wheels and tighten your lug nuts in a star pattern to 88 ft-lbs.
Review and Conclusions
You won't be able to notice any difference in the drivability of your car, but you can rest assured that your strut towers are safe and if you accidentally hit a monster pot hole, that no serious strut tower damage will occur. Think if it as a $14 insurance policy. I made sure that I did it, and so should you!
Disclaimer
All product manufacturer logos are property of their respective manufacturer.